– The article provides information about a set of three stainless steel fine mesh strainers that can be used in DIY projects.
– The strainers are equipped with insulated handles and can be used for various purposes such as straining tea, coffee, powder, fry, juice, rice, vegetables, and fruits.
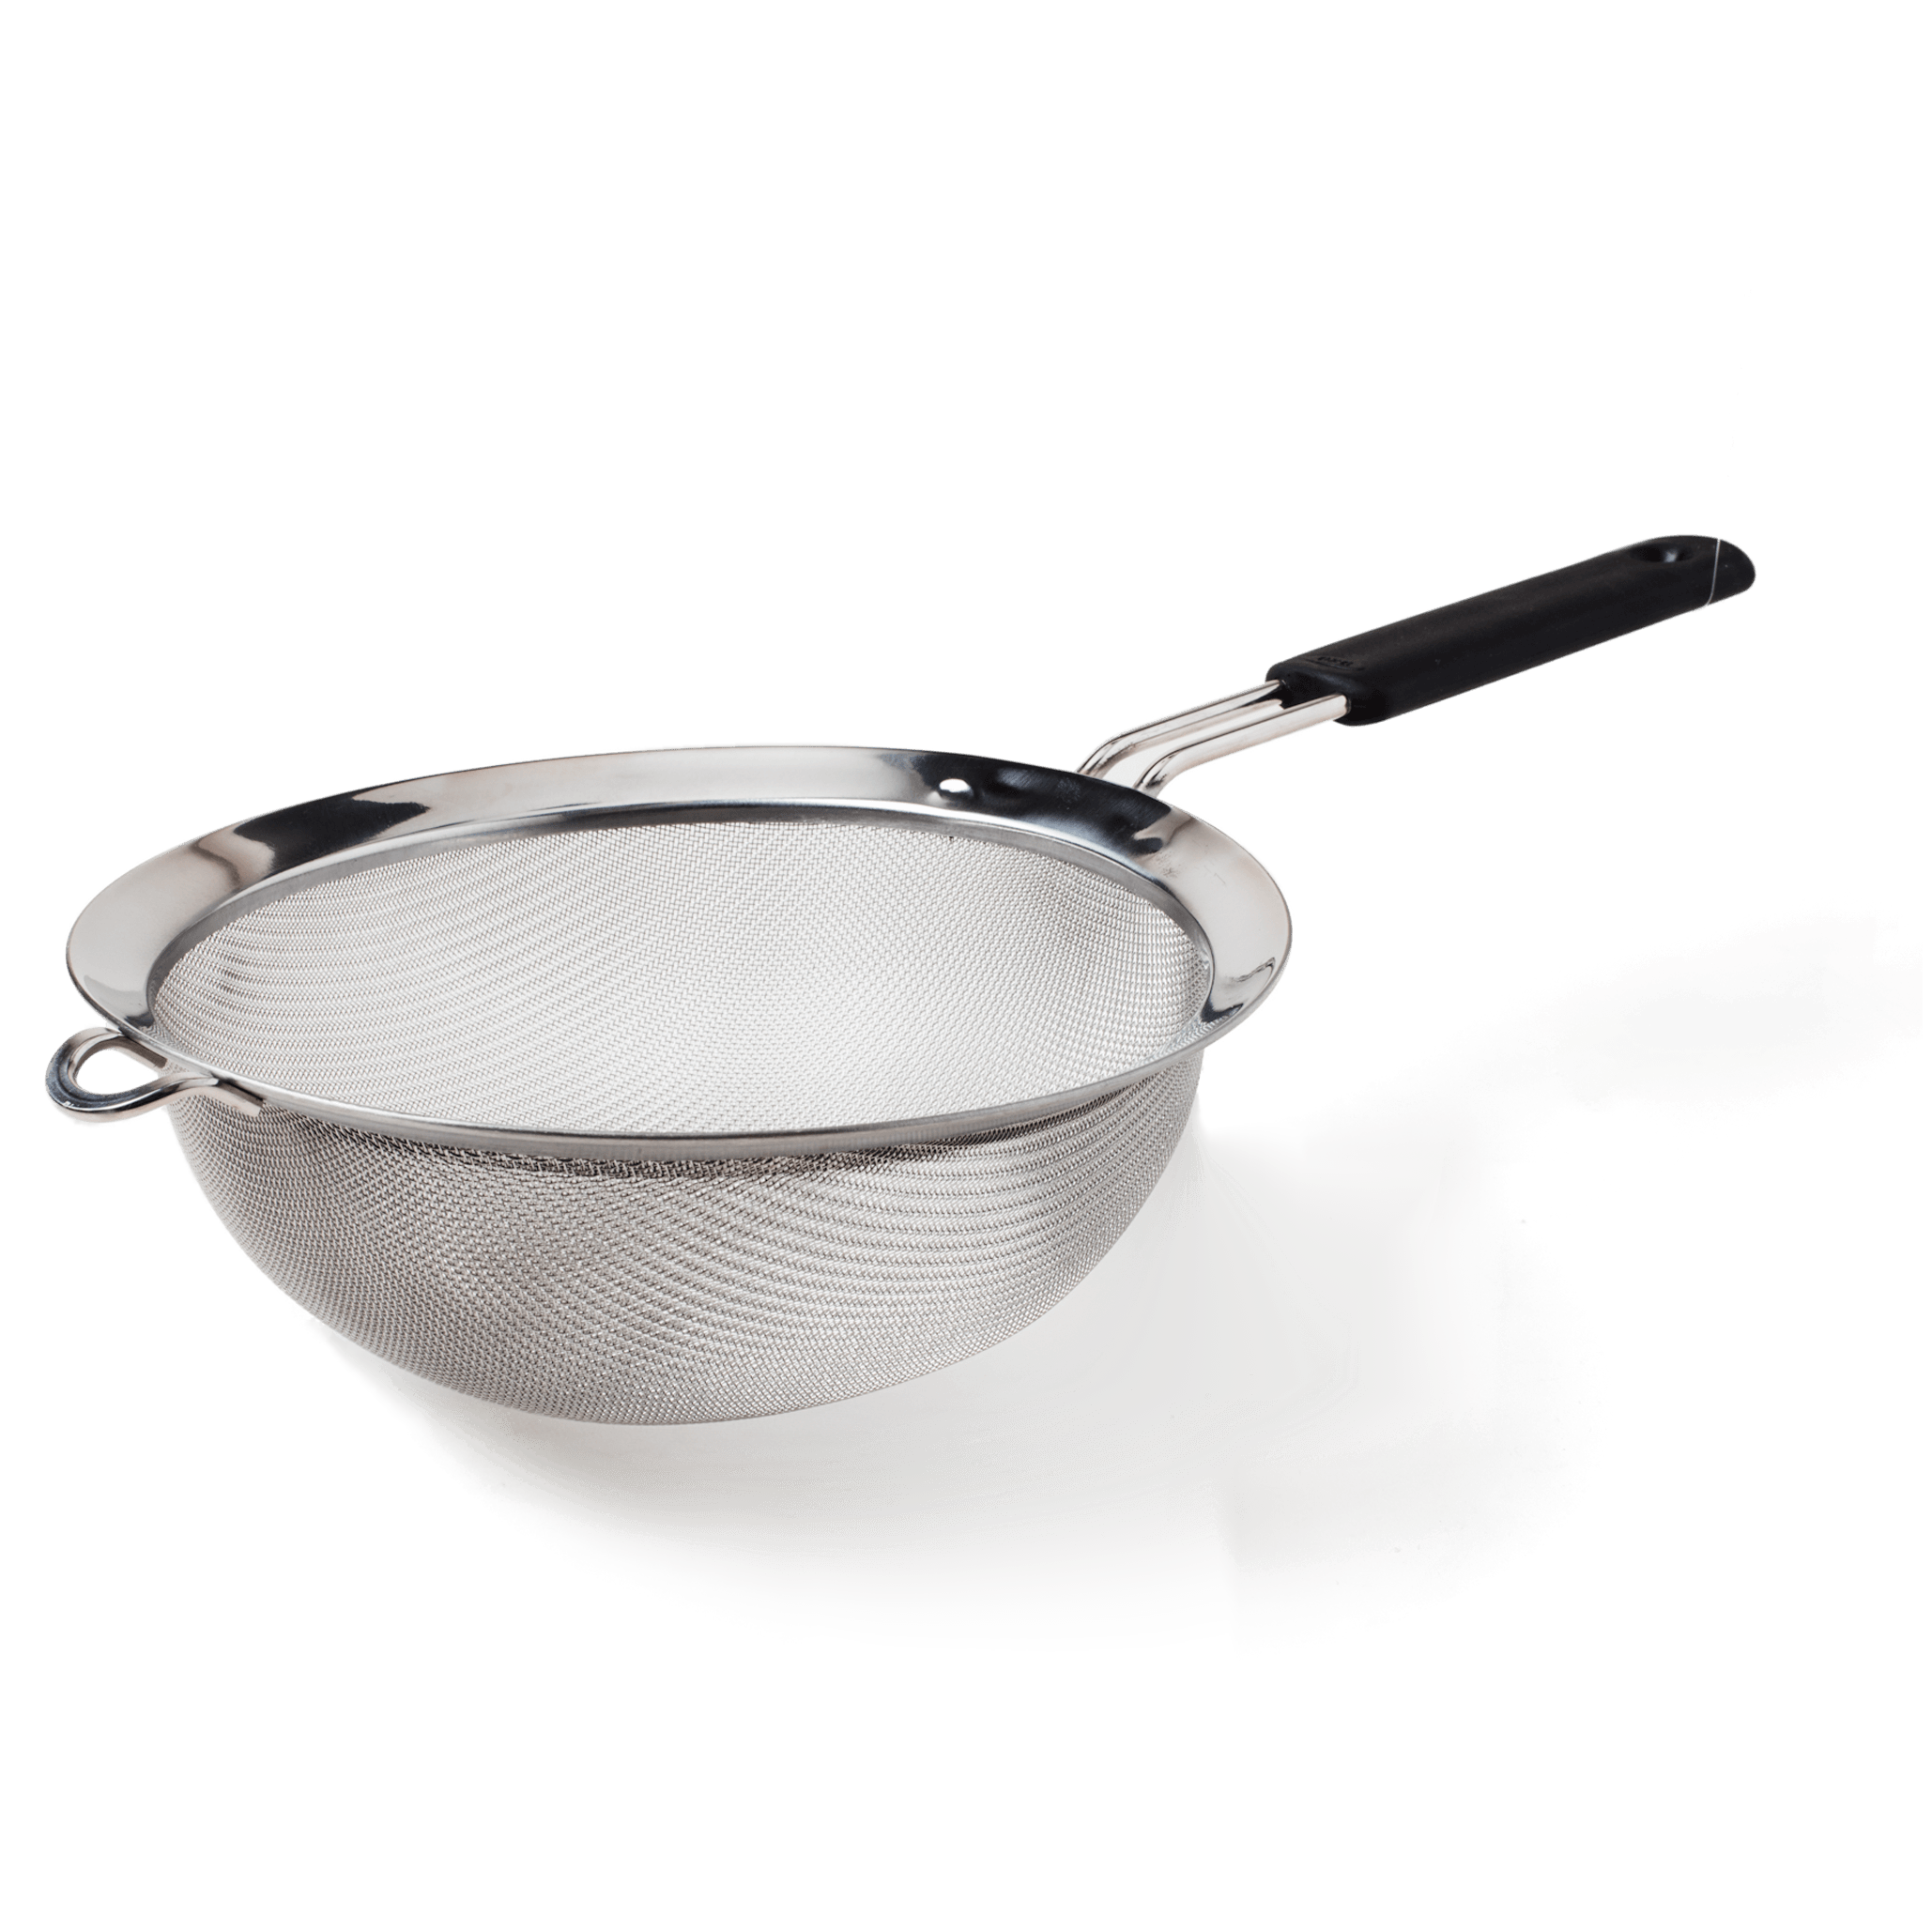
– The article mentions the Rösle Stainless Steel Round Handle Kitchen Strainer as the favorite fine mesh strainer, as it is sturdy and can catch even the smallest particles.
– The Yummy Kitchenware 9-inch Fine Mesh Strainer is recommended as a more budget-friendly option.
– The article tested eight fine-mesh strainers priced between $13 and $40.
– The Rösle strainer is described as ultra-sturdy and practically dent-proof, with a rounded, ergonomic handle and stable bowl rest.
– The Yummy Kitchenware strainer performed almost as well as the Rösle in tests and was priced at $16.
– The article conducted tests using the strainers, including sifting whole-wheat flour, straining a seedy strawberry sauce, and straining pastry cream.
– Different strainer models have varying levels of durability, with some mesh baskets denting more easily than others.
– The performance of the strainers was tested by sifting whole wheat flour and straining a seedy strawberry sauce.
– Models from Rösle, RSVP, and Yummy had finer mesh and were able to catch more bran and seeds/pulp from the flour and sauce.
– The Cuisinart 7.5-inch strainer performed poorly, producing a grainy sauce with lots of seeds and pulp.
– All models were capable of producing good-textured pastry cream, with no noticeable difference between batches passed through different strainers.
– Handle design and durability also played a role in the evaluation, with models with rounded handles or silicone/plastic coverings being preferred for comfort and control.
– Models with flat or wire loop metal handles were uncomfortable to hold and offered less control.
– The article discusses a comparison of different fine-mesh strainers, including the Yummy, KitchenAid, Rösle, Winco, and Cuisinart models.
– Mesh size is important for straining, with smaller holes yielding better results.
– Handle comfort and control, hooks for stability, and overall construction are all important factors to consider when choosing a fine mesh strainer.
– The most recommended strainer is sturdy and well-constructed, with a wide hook and a comfortable handle.
– The Yummy Kitchenware 9-Inch Fine Mesh Strainer performed well in tests, tying for second place in the flour sifting test and straining strawberry sauce effectively.
– The OXO Good Grips 8-Inch Double Rod Strainer and the KitchenAid Classic Strainer also performed well in tests.
– The Winco Strainer with Single Fine Mesh and the Cuisinart Set of 3 Fine Mesh Strainers performed poorly in tests.
– The RSVP International Stainless Steel Mesh Strainer had a design flaw but strained strawberry sauce quickly and well.
– The article also provides information on the difference between a fine-mesh strainer, colander, and sieve.
– Fine mesh strainers have small holes that prevent small foods from getting through but allow liquid to drain.
– Cheesecloth, coffee filters, and kitchen towels can be used as alternatives to fine mesh strainers in certain situations.
– Flour sifters can be used for de-clumping and aerating dry ingredients.
– Fine mesh strainers are versatile and can be used for tasks such as sifting flour, scattering cocoa powder, straining pasta and rice, and draining various liquids.
– Rösle and Yummy Kitchenware are recommended brands for fine mesh strainers.
Continue Reading