Scotch Bonnet Pepper Substitute: Exploring Fiery Culinary Alternatives

– The best substitute for Scotch bonnet pepper is the habanero pepper, as it has a similar flavor and heat level and is easier to find.
– Orange habanero peppers and Jamaican hot sauce are also good substitutes.
– Dried Scotch bonnet peppers can be ordered online if needed.
– Ghost peppers, Thai chilies, cayenne powder with lemon zest, cachucha pepper, and habanero peppers are other substitutes mentioned.
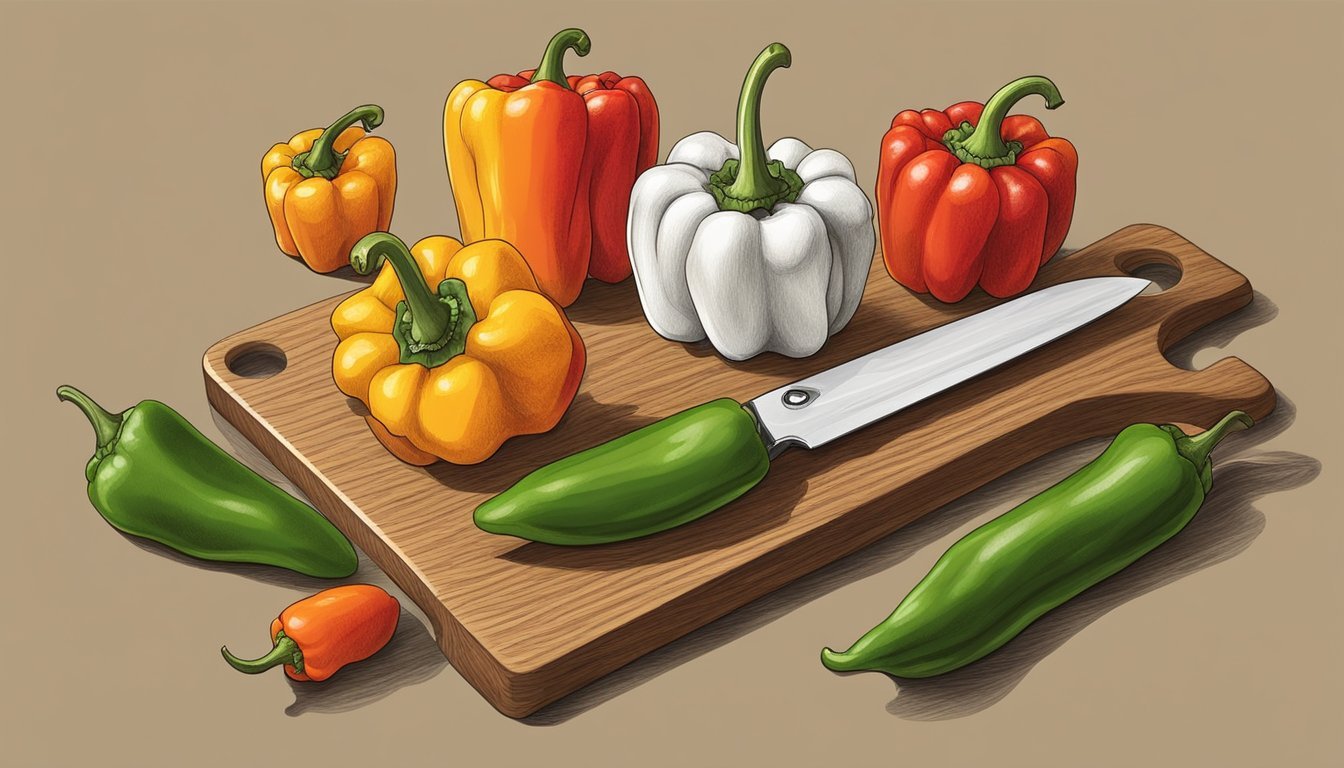
– Jalapeños, poblanos, and bell peppers are not good substitutes for scotch bonnets.
– Habanero peppers are the best alternative to scotch bonnets, as they have a similar fruity flavor, with habaneros having more floral taste and scotch bonnets having more citrus notes.
– Both habaneros and scotch bonnets have similar heat levels, ranging from 100,000 to 250,000 SHUs.
– Red habaneros can be even spicier, often surpassing 500,000 SHUs on the Scoville scale.
– Dried scotch bonnet peppers (whole or powdered) can be ordered online as a substitute for fresh ones.
– Ghost peppers and other super-spicy peppers like Carolina reapers or scorpion peppers can also be used as substitutes, but the amount used should be scaled down, as they are spicier than scotch bonnets.
– Thai chilies offer respectable heat and flavor as a substitute for scotch bonnet peppers, but they may be challenging to find.
– Cayenne powder combined with lemon zest can mimic the flavor of scotch bonnets in a substitute.
– Cachucha pepper (aji dulce) is a non-spicy alternative to scotch bonnets, used for adding flavor without heat to dishes.
– Growing your own scotch bonnets from seeds is an option to obtain real peppers.
– Buying dried Scotch bonnets or powder is another option, as they retain both heat and flavor.
– Shopping at local farmer’s markets during the summer months may provide an opportunity to find fresh scotch bonnets.

Continue Reading

The History and Cultural Significance of Italian Dunkers: Exploring the Origins, Recipes, and Traditions

List of Pertinent Information:

1. Italian Dunkers is a dish made with hot dog buns or ciabatta bread.
2. The bread is slathered in garlic butter.
3. Mozzarella cheese is added as a topping.
4. Italian seasoning and marinara sauce are used as flavorings.
5. The recipe involves air frying or toasting the bread until the cheese is bubbly and starting to brown.
6. Suggestions for variations and dipping sauces are provided.
7. Instructions for preparing and storing the dish are given.
8. Alternative bread and cheese options can be used.
9. Additional tips for using leftovers and reheating are provided.

Continue Reading

Yogurt and Granola: The Health Benefits Unveiled!

– Yogurt with granola is a quick and easy meal option for breakfast or snack.
– You can customize your bowl with toppings like honey, agave, fruit, hemp seeds, and chia seeds.
– The ingredients needed are your favorite yogurt, homemade granola, and various toppings.
– Foragers Cashewmilk Yogurt is recommended as a dairy-free, soy-free, organic, and vegan option.
– Homemade granola is considered healthier and tastier than store-bought granola.
– Different options for homemade granola include healthy chocolate, grain-free, protein-packed, and honey almond flavors.
– The article provides suggestions for creating yogurt bowls with granola.
– It mentions five different options for yogurt and granola bowl combinations: almond butter and raspberry jam, sweet apricot, antioxidant chocolate banana, grain-free super-seed, and protein-packed.
– it gives tips for making the best yogurt bowl, such as pre-washing fruit and using homemade or store-bought granola.
– The article answers common questions about the healthiness of yogurt with granola and suggests other ways to enjoy granola.
– This article is about a Greek Yogurt with Granola snack.
– The snack is made with real Greek yogurt, crunchy granola, and a touch of honey for sweetness.
– The Greek yogurt provides a creamy texture and the granola adds crunch.
– It is a high-protein snack that can be eaten on the go.
– The recipe can be customized by using different flavors of yogurt, fruits, and nuts.
– The yogurt parfait can be made ahead of time and can last up to 3 days in the refrigerator.
– It is a healthy breakfast option, with one serving containing around 250-350 calories.
– Various nuts and seeds can be added as toppings.
– The article discusses making yogurt and granola parfaits for breakfast.
– it suggests using flavored or sweetened yogurt and using honey, maple syrup, or agave as a sweetener.
– It recommends adding peanut butter or almond butter for flavor and chocolate chips for a touch of chocolate.
– It mentions that Greek yogurt works best but regular yogurt can also be used.
– The article advises refrigerating the parfaits and consuming them within 3 days.
– It suggests topping the yogurt with fruit, chia seeds, and sliced almonds.
– The article also provides related recipes for a chocolate peanut butter smoothie, make-ahead breakfast recipes, and an overnight eggs benedict casserole.
– It suggests serving the parfaits with homemade granola, air fryer hard-boiled eggs, or baked French toast with strawberry jam.
– The article encourages readers to subscribe to the author’s YouTube channel and leave a rating for the recipe.

Continue Reading

How Long Does Vermouth Last and Proper Storage

– Vermouth typically has an alcohol by volume (ABV) of 16-22%.
– Once opened, the shelf life of vermouth begins to slowly count down.
– Vermouth is a blend of wine and botanicals, with wormwood being a standard ingredient.
– Vermouth can be consumed as an aperitif or mixed into cocktails.
– The history of vermouth dates back to Ancient Greece, where it was originally created for medicinal purposes.
– Monks later continued the production and spread of vermouth making across Europe.
– Vermouth is an essential ingredient in cocktails such as Manhattans, martinis, and Negronis.
– Vermouth can also be enjoyed on its own or mixed with soda water.
– Vermouth is an aromatized wine that gets its flavor from botanicals, herbs, spices, and other ingredients.
– Vermouth is fortified with distilled alcohol, making it last longer than regular wine.
– Proper storage is crucial to keep vermouth fresh and maintain its flavor.
– Using vermouth that has gone off in a cocktail will result in a sub-par drink.
– There are tips available for keeping both dry and sweet vermouth at its best.

Continue Reading

Reheat Quiche: The Best Methods for Delicious Results

– The article explains how to reheat quiche without it drying out and the crust turning soggy.
– There are 4 easy methods to reheat quiche depending on available kitchen appliances and time availability.
– Quiche can be reheated the next day or up to 4 days if stored in the fridge.
– The best results are achieved by using the oven.
– Reheating in the oven ensures even heat distribution, a crisp crust, and can warm up an entire quiche or just a few slices.
– The oven should be preheated to 350 degrees F.
– Quiche should be brought to room temperature while the oven preheats.
– The crust should be covered with foil if it’s already dark golden brown.
– Reheat in the oven for 15-20 minutes or until the inside of the quiche reaches 165 degrees F.
– The microwave can be used to quickly reheat a slice of quiche.
– Bringing the quiche to room temperature for 20 minutes before reheating is recommended.
– Place the quiche on a microwave-safe plate and use a low-to-medium power setting.
– Reheat for 2 minutes and check the temperature.
– If necessary, heat for another 15-20 seconds at the same power setting.
– Rest the quiche for 60 seconds before serving.
– The toaster oven can be used to reheat one or two pieces of quiche.
– Preheat the toaster oven to 375 degrees F.
– Cover the crust with foil if it’s already dark golden brown.
– Reheat in the toaster oven for 10-15 minutes.
– To reheat quiche in an air fryer, preheat it to 300 degrees F and place the quiche slices on the rack. Reheat for 4-7 minutes or until heated through.
– To reheat frozen quiche, preheat the oven to 350 degrees F. Place the quiche on a baking sheet and cover with foil. Heat for 30-40 minutes or until the inside of the quiche is 165 degrees F.
– Quiche can be stored in the refrigerator for up to 4 days or in the freezer for up to 3 months.
– Expert tips include letting the quiche come to room temperature before reheating and preheating the oven, toaster oven, or air fryer before reheating.
– If the crust is already dark brown, it can be covered with foil before reheating.
– It is suggested to let the quiche sit for 60 seconds before serving when reheating in the microwave.

Continue Reading

How Long Do You Steam Tamales for Perfectly Cooked Results?

List of pertinent information about steaming tamales:

1. Steaming is one of the methods used to cook tamales.
2. Cooking time for tamales can vary between 10 minutes to 1 hour 20 minutes.
3. The cooking time depends on the recipe, cooking method, size, thickness, and filling.
4. Store-bought tamales can be frozen and reheated in the microwave, but steaming is recommended.
5. Steaming tamales involves using a large pot or Dutch oven with a steamer basket and a tight-fitting lid.
6. Tamales should be arranged upright in the pot, not overcrowded, and cooked until the masa dough is firm and thoroughly cooked.
7. It is important to periodically check if there is enough water in the pot and test a tamale for doneness before serving.
8. Traditional steaming can take about 1 hour, while using a pressure cooker only requires 10 minutes on high pressure.
9. The article includes a recipe for homemade instant pot tamales, listing the required ingredients.
10. Reheating tamales should be done by steaming them again for 10-15 minutes.
11. Reheating in the microwave, oven, or air fryer can cause the tamales to dry out.
12. The article provides instructions for reheating tamales in the microwave, using a microwave-safe plate and a damp paper towel.
13. Additional cooking ideas with masa, such as gorditas and sopes, are mentioned in the article.

Continue Reading

Le Creuset Dutch Oven Sizes: Your Complete Buying Guide

Le Creuset Dutch Oven Sizes:

– 1.5 Quarts / 1.3 Liters
– 2 Quarts / 1.8 Liters
– 2.5 Quarts / 2.4 Liters
– 3.5 Quarts / 3.3 Liters
– 4.5 Quarts / 4.2 Liters
– 5.5 Quarts / 5.3 Liters
– 7.25 Quarts / 6.7 Liters
– 9 Quarts / 8.4 Liters
– 13.25 Quarts / 12.4 Liters
– 2.75 Quarts / 2.6 Liters (oval)
– 3.5 Quarts / 3.2 Liters (oval)
– 4.25 Quarts / 4.1 Liters (oval)
– 5 Quarts / 4.7 Liters (oval)
– 6.75 Quarts / 6.3 Liters (oval)
– 9.5 Quarts / 0 Liters (oval)
– 15 Quarts / 14.1 Liters (oval)

Le Creuset Saucepan Sizes:

– 1.25 Quarts / 1.2 Liters
– 2 Quarts / 1.8 Liters
– 2.75 Quarts / 2.5 Liters
– 2.5 Quarts / 2.3 Liters

Le Creuset Skillet and Grill Pan Sizes:

– 6.3 inches
– 9 inches
– 10.25 inches
– 10.6 inches (deep skillet)
– 11.75 inches

Continue Reading

How to Tell if Shrimp is Bad: Significantly Minimize Health Risks

– Smell is a good indicator of whether cooked shrimp has gone bad. If it smells fishy or sour, it’s likely not safe to eat.
– The texture of cooked shrimp should be firm and slightly springy. If it feels slimy or mushy, it has spoiled.
– Cooked shrimp should be a pinkish color. If it looks gray or has dark spots, it could be spoiled.
– Check the date of when the shrimp was cooked. Shrimp should be eaten within 2-3 days of cooking.
– If something doesn’t seem right about the cooked shrimp, it’s best to throw it away.
– Eating bad shrimp can cause shellfish poisoning, with symptoms including diarrhea, severe vomiting, headaches, pain in the abdomen or cramps, nausea, blood spots in stools, and fever.
– Fresh shrimp should have a pinkish hue. Avoid shrimp that is gray or has black spots.
– The texture of fresh shrimp should not be slimy or mushy.
– Fresh shrimp should have a mild, briny odor. Avoid shrimp that smells overly fishy or sour.
– Clear and shiny eyes indicate fresh shrimp, while cloudy or dull eyes indicate shrimp that is not fresh.
– Discoloration, such as yellowing or browning, is a sign of bad shrimp.
– The shelf life of raw, shelled shrimp is 1-2 days in the refrigerator.
– The shelf life of raw, shell-on shrimp is 2-3 days in the refrigerator.
– The shelf life of cooked shrimp is 3-4 days in the refrigerator.
– Both raw and cooked shrimp can be frozen for 2-3 months.
– To store fresh shrimp, place it in a single layer in an air-tight container with wax paper to absorb moisture.
– Store the shrimp container tightly in the coldest area of the fridge, preferably on crushed ice to keep it colder.
– Shrimp should not have any mold on it or the packaging.
– Frozen shrimp should not have ice crystals or frost, which could indicate thawing and refreezing.
– Freezer burn can occur if shrimp has been in the freezer for more than 3 months.
– Look for signs of spoilage such as a funky smell or discoloration in frozen shrimp.
– Trust your senses, if the shrimp doesn’t look, smell, or feel right, it’s likely bad.
– Tips to tell if cooked shrimp is bad: smell it (if it smells fishy or sour, it’s likely not safe to eat), check the texture (if it feels slimy or mushy, it has spoiled), look at the color (should be pinkish, not gray or have dark spots), check the date (should be eaten within 2-3 days of cooking).
– Eating bad shrimp can cause shellfish poisoning with symptoms like diarrhea, severe vomiting, headaches, abdominal pain or cramps, nausea, blood spots in stools, and fever. Symptoms can appear between 4 to 48 hours after consumption.
– To identify fresh shrimp: look for a pinkish hue, avoid gray or black spots, check the texture (should not be slimy or mushy), and smell it (should have a mild, briny odor, not overly fishy or sour).
– Fresh shrimp should have clear and shiny eyes.
– Shrimp with cloudy or dull eyes is not fresh.
– Fresh shrimp should not have any discoloration, such as yellowing or browning.
– Fresh shrimp should be stored in an airtight container or a resealable plastic bag.
– Wax paper should be placed loosely over the container to absorb excess moisture.
– The container should be stored tightly in the coldest area of the fridge, preferably on crushed ice.

Continue Reading

How Long Does Lasagna Last in the Fridge? Top Storage Tips to Maximize Freshness

How long does lasagna last in the fridge?

– Leftover lasagna can last 3 to 5 days in the fridge.
– The article provides tips for reheating lasagna to prevent it from becoming dry.
– The article mentions that reheating a whole lasagna is possible by covering it in foil and using an oven.
– Thawing frozen lasagna in the refrigerator overnight is recommended.
– It can also be reheated without thawing by adding extra cooking time.
– To prevent the lasagna from drying out, the article suggests adding a splash of water and covering it with foil, plastic wrap, or a paper towel.
– The article also provides instructions for reheating lasagna in the microwave using a toothpick to prevent the cover from touching the lasagna.
– The article discusses how to reheat lasagna in an air fryer and provides safety tips for reheating and storing lasagna leftovers.
– It suggests preheating the air fryer to 375º and placing the lasagna in a loaf pan covered with aluminum foil.
– The lasagna should be heated through to an internal temperature of 165°F.
– It is mentioned that lasagna can be reheated multiple times as long as it reaches the proper temperature, although the quality will degrade with each reheat.
– Leftover lasagna can last up to 3 months in the freezer.

Continue Reading