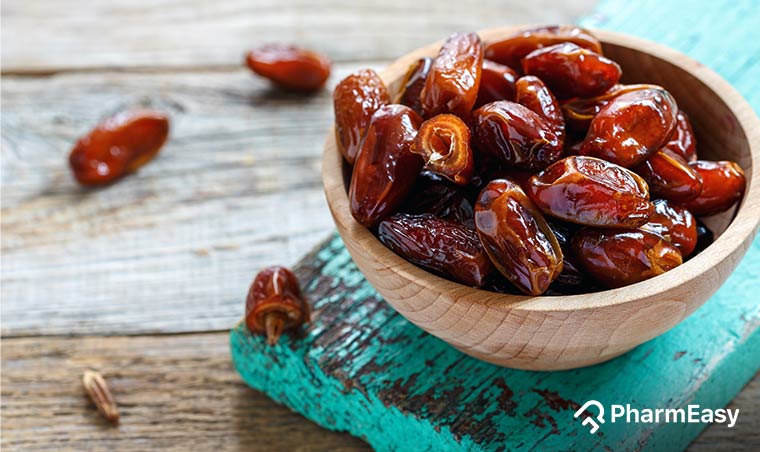
Discover the Art of Shaping a Perfect Challah Roll: A StepbyStep Guide

– How to make challah rolls
– Ingredients for challah rolls
– Steps to make challah rolls
– Tips for substituting honey with sugar in challah rolls recipe
– How to make mini challah dinner rolls
– Tips for dividing and shaping dough for big and fluffy rolls
– How to shape challah knots and braided bread rolls
– Importance of pinching and securing the underside of rolls
– Applying double egg wash for a shiny and golden color
– Proofing time for challah rolls
– Baking temperature and time for challah rolls
– Storing and freezing challah bread
– Tips for preparing and serving challah bread
– Substituting eggs with water in challah rolls recipe
– Using milk wash instead of egg wash for a different finish
– Proper kneading and proofing for fluffy challah bread
– Common problems with making challah bread
– Properly risen challah bread characteristics
– Causes of dense challah bread
– Preventing burning on the outside and rawness on the inside
– Proper storage of challah bread
– Reheating methods for frozen challah bread
– Preparing dough ahead of time for challah bread
– Toppings and serving suggestions for challah bread
– Pronunciation of challah in Hebrew
– How to prevent splitting of challah bread dough
– Identifying ready-to-bake challah dough
– Causes of yeasty smells in challah bread
– Recipe for making challah rolls
– Substitution ingredients for challah rolls recipe
– Proper kneading time for challah dough
– Proofing time for challah dough before shaping
– Shaping and baking instructions for challah rolls
– Recipe for making challah buns
– Additional steps for achieving a golden brown color and sesame seed topping
– Proper baking temperature and time for challah buns

Continue Reading

The Origin and Benefits of Cheese Foam Tea: An Uncommonly Delicious and NutrientRich Beverage

– Cheese foam tea is a popular beverage in Taiwan, where it was invented over two decades ago.
– Most recipes use cream cheese or cheese foam powder for flavor.
– The base of the foam is typically a heavy whipping cream flavored with milk, condensed milk, milk powder, cheese foam powder, or cream cheese.
– Milk and/or condensed milk are added to loosen the texture.
– The foam is whipped up to order with a hand mixer and then scooped over a drink, usually plain iced tea or fruit tea.
– Adding boba (tapioca pearls) is optional.
– Cheese foam tea is a different trend from boba tea.
– Taiwanese purveyors started adding cheese foam on top of sweet iced tea in 2002.
– Cheese foam tea stands can now be found across Taiwan, Hong Kong, China, and beyond.
– Cheese foam brings back fond memories for some, as it was a popular drink to enjoy with friends at tea shops.
– Cheese foam tea, also known as cheese mouse tea, cheese cap tea, cheese mousse tea, and milk foam tea, originated in Taiwan in 2010.
– The traditional version uses cream cheese mixed with whipping cream and milk to create a frothy layer on top of iced green or black tea.
– In 2012, the powdered cheese was replaced with cream cheese in the Guangdong province in China, resulting in a thicker but sippable foam.
– Cheese tea is served cold without ice and is typically enjoyed without a straw.
– Special lids have been made to allow for the mixing of the foam and tea as it is consumed.
– Cheese tea can be purchased from specialty drink shops or made at home.
– Cheese tea is different from instant milk tea available in grocery stores.
– Cheese tea has a cream cheese and milk foam cap on top, which can be swirled into the tea or sipped separately.
– The main ingredients of cheese tea are tea (black or green tea), cheese (cream cheese or cheese powder), milk or cream for the frothy top, and salt for a savory flavor.

Continue Reading

Discover the Secret to Perfectly Crispy Chicken Fries in Air Fryer A Foolproof Guide!

– Air fryer chicken fries are a quick and easy main course option that cooks in less than 15 minutes.
– Tyson frozen chicken fries made in the air fryer are crispy on the outside and juicy and flavorful on the inside.
– It takes 10 to 12 minutes to cook frozen chicken fries in the air fryer at 400°F.
– Preheating the air fryer may result in faster cooking times.
– Chicken fries can be served with various dipping sauces such as ketchup, barbecue sauce, honey mustard, or ranch dressing.
– Leftover chicken fries can be stored in the refrigerator for up to 3 days and reheated in the air fryer at 360°F for 3 to 5 minutes.
– It is recommended to cook chicken fries in a single layer without overcrowding the air fryer basket or tray. Cook in batches if necessary.
– Chicken fries are long, thin strips of breaded and deep-fried chicken that resemble French fries. They are commonly seasoned with spices and herbs and can be found at fast food chains such as Burger King.
– Most frozen chicken fries brands are fully cooked but need to be reheated. If the packaging states “fully cooked,” they are ready to be reheated. If the packaging states “raw,” they need to be cooked until they reach an internal temperature of 165°F.
– The article provides a recipe for making air fryer chicken fries from scratch, using chicken breasts, mayo, and shake and bake seasoned breading mix. It gives step-by-step instructions for preparing and cooking the chicken fries in an air fryer.
– The article encourages readers to share their recreations on Instagram and provides links to other air fryer recipes.
– Tips for cooking with an air fryer are provided.
– The cooking time for chicken fries in an air fryer is 10 minutes.
– If you want the chicken fries crispier, you can add an extra minute or two.
– It is important to lay the chicken fries in the air fryer basket in a single layer with space between each one to allow proper crisping.
– It is recommended to shake the basket halfway through the cooking time to ensure even cooking.
– There is no need to spray the basket with oil as the chicken fries already contain oil to prevent sticking.
– Leftover chicken fries can be reheated in the air fryer at 380 degrees F for about 3 minutes until heated through and crispy.
– The recipe suggests serving the chicken fries with a dipping sauce of your choice.
– The nutrition information provided is based on the exact products used in the recipe.

Continue Reading

Frozen tortellini: a delectable Italian comfort food

List:

– Frozen tortellini
– Stuffed pasta
– Northern Italy
– Pork
– Veal
– Meat and cheese fillings
– Broth
– Shredded cheese
– Tomato sauce
– Homemade tortellini
– Convenient option
– Boiling
– Baking
– Instant Pot
– Microwave
– Boiling time
– Baking temperature
– Foil
– Cheese topping
– Water
– Tortellini skewers
– Stir-fry with vegetables
– Tortellini recipes
– Nutritional information
– Calories
– Sugar
– Sodium
– Fat
– Saturated fat
– Carbohydrates
– Fiber
– Protein
– Cholesterol
– How to cook frozen tortellini
– Filled pasta
– Images
– Permission
– Recipe sharing
– Creamy tomato sauce
– Refrigerated tortellini
– Tomato sauce
– Tomato paste
– Cream
– Half and half
– Chicken broth
– Vegetable broth
– Minced garlic
– Garlic powder
– Italian seasoning
– Red pepper flakes
– One pot
– Storage of frozen tortellini
– Reheating frozen tortellini
– Microwave reheating
– Stovetop reheating
– Adding broth or water
– Creamy sauces and freezing
– Chicken tortellini soup
– Tortellini with mushrooms
– Creamy Tuscan tortellini
– Creamy tortellini Alfredo

Continue Reading

Internal Temp Hamburger: Ensuring Safe and Delicious Cooking

– The article provides a burger temperature chart for cooking beef burgers to the perfect internal temperature.
– The chart includes the internal temperature and cooking time for different levels of doneness: medium-rare (130-135°F, 6 minutes), medium (145°F, 7-8 minutes), medium-well (150-155°F, 9 minutes), and well-done (160-165°F, 10 minutes).
– The USDA recommends cooking ground beef to at least 160°F for food safety.
– Medium-rare burgers are brown on the outside but still very pink in the middle, and they are considered super juicy and flavorful.
– Medium burgers are slightly longer cooked but still have a pink middle, providing juicy and flavorful beef.
– Medium-well burgers have a small amount of pink in the middle and should be watched closely during cooking.
– Ground beef should be cooked to well-done according to safety guidelines from the USDA.
– The best and most accurate way to determine when a burger is done is to use an instant-read meat thermometer.
– A well-done burger will have no pink in the middle.
– Burgers are safe to eat anywhere from medium-rare to well-done.
– The cooking time for burgers depends on the desired level of doneness.
– The perfect burger temperature depends on personal preference.
– The thickness of the burger patties affects cooking time and doneness level.
– Ground chicken or turkey should be cooked to an internal temperature of 160-165°F.
– The USDA mandates that pre-ground meat must be cooked to an internal temperature of 160°F to ensure food safety.
– Ground poultry must be cooked to a temperature of 165°F to be considered safe.
– Bacteria on whole cuts of meat are mainly on the surface and do not migrate inside, so steaks can be eaten at a medium-rare temperature of 130°F.
– When ground meat is made from whole cuts, the bacteria mixes throughout the meat, so it must be cooked to 160°F in the middle to kill any bacteria.
– Ground beef is more susceptible to contamination than whole cuts due to the process of grinding and processing, which distributes bacteria throughout the meat.
– Grocery stores and restaurants can serve contaminated meat if multiple cows are processed into one batch of ground beef.
– Chefs have different opinions on the USDA guidelines for cooking ground meat.
– Restaurants must adhere to USDA guidelines and work with health departments to create a Hazard Analysis and Critical Control Point (HACCP) plan.
– To serve a medium-rare burger, the meat must be ground in-house; pre-ground meat must be cooked to 160°F.
– Tips to reduce the risk of contamination when preparing burgers include keeping ground beef cold, using separate prep areas for raw meat and produce, and washing hands before and after handling raw meat.
– Grinding your own meat allows you to have control over what goes into your burger and experiment with different flavor combinations.
– Grinding meat at home is cost-effective and can save money compared to buying pre-ground meat.
– Any ground beef under 160°F is considered unsafe according to USDA standards.
– Different levels of doneness for burgers include well-done (160°F to 165°F), medium-well (150°F to 155°F), medium (140°F to 145°F), medium-rare (130°F to 135°F), and rare (120°F to 125°F).
– The article suggests using a two-stage cooking method for burgers to achieve the perfect doneness.
– Grilling burgers from frozen can yield good results.
– The two-stage method of cooking burgers on a grill involves initially cooking them on the unheated side of the grill, then moving them to the high-heat side to sear until the desired temperature is reached.

Continue Reading

3 Ingredient Ground Beef Recipes: Quick and Tasty!

– Cheesy Beef Enchilada Dip
– Easy Sloppy Joe
– Sweet and Sour Meatball Recipe
– Bacon Cheeseburger Pull Apart Bread
– 5 Ingredient Chili
– Lazy Day Crock Pot Lasagna
– Ground beef tacos
– Crockpot beef noodle casserole
– Cheeseburger tater tot casserole
– Egg roll in a bowl
– Crockpot spaghetti sauce
– Crockpot lasagna soup
– Mexican taco casserole
– Hamburger hashbrown casserole
– Ground beef enchiladas
– Beef burritos
– Walking tacos
– Texas toast sloppy joes
– Sloppy joes
– Homemade spaghetti sauce
– Crock pot Frito chili pie
– Dorito taco salad
– Cracker Barrel meatloaf
– Ground beef tostada
– Crock pot cowboy chili
– Cowboy casserole
– Homemade hamburger helper
– Skillet lasagna
– Loaded mashed potato casserole
– Ground beef taco dip
– Easy taco wonton cups
– Easy lasagna

Continue Reading

Tamari Substitute: Exploring Flavorful and Healthier Alternatives

– Tamari is a Japanese type of soy sauce that contains little to no wheat
– Tamari is a gluten-free substitute for soy sauce
– Tamari has a richer, more savory flavor compared to soy sauce
– The best tamari substitutes are soy sauce, coconut aminos, liquid aminos, and fish sauce
– Coconut aminos can be used as a 1:1 substitute for tamari, but may require more for desired taste due to its lower saltiness
– Liquid aminos, which contains soy, can be used as a substitute for tamari
– Fish sauce can be used as a tamari substitute, but it is much stronger and should be used in lesser amounts
– Salt can be used as a simple substitute for tamari, providing a cleaner flavor
– Miso paste can be used as a substitute for tamari and should be mixed with water before using
– Anchovies can add savory saltiness and depth of flavor to dishes.

Continue Reading

How to Cook Neck Bones: A Flavorful and Nutritious Guide

How to cook neck bones
Recipe for cooking Southern neck bones and gravy
4 lbs pork neck bones
1 large yellow onion
Olive oil
Black pepper
Seasoning salt
Minced garlic
Sliced white mushrooms
Vegetable oil
All-purpose flour
Water
French onion soup mix
Instructions for cooking neck bones:
1. Fill a pot with approximately 8 cups of water and bring it to a boil.
2. Remove any foam and grit that surfaces, then drain the liquid and rinse the neck bones.
3. Drizzle two tablespoons of olive oil into a large pot and heat it over medium-high heat.
4. Cook thinly sliced onions until golden brown, then add the neck bones and stir.
5. Add garlic, seasoning salt, and black pepper to the pot and cook for 10 minutes.
6. Add 10 cups of water and boil over medium-high heat for 20 minutes.
7. Remove about 1 cup of liquid and set it aside, then sprinkle in the french onion soup mix.
8. In a separate saucepan, heat vegetable oil and sprinkle in all-purpose flour until browned and thickened.
9. Pour the reserved liquid into the saucepan and mix well, then add the mixture back into the pot with the neck bones.
10. Stir in sliced mushrooms and cover the pot, letting it cook for about 30 minutes or until tender.
11. Leftover neck bones and gravy can be stored in airtight containers and reheated in the microwave.
12. Neck bones and gravy are often served with rice as part of a southern soul food meal.

Continue Reading

Air Fryer Rotisserie: Revolutionize Your Cooking with Ease

An air fryer rotisserie is a kitchen appliance that allows users to cook food in a healthier way. It uses hot air circulation to cook food with minimal oil, resulting in crispy and delicious meals. The appliance comes with a rotisserie function that allows users to roast whole chickens, kebabs, or other meats. Some models also come with additional accessories like skewers and racks for added versatility. Air fryer rotisseries are easy to use and require less cooking time compared to traditional ovens. They are suitable for various cooking methods, including baking, grilling, and frying. Overall, an air fryer rotisserie offers a convenient and healthier way to cook a variety of meals at home. The article discusses the use of rotating baskets in air fryers and provides a list of foods that can be cooked in an air fryer, including meat dishes, vegetables, baked food, frozen foods, roasted nuts, potatoes, fish and seafood, baked meals, and desserts. It emphasizes the importance of rotating the food in the fryer to ensure even cooking. The article also mentions the need to remove the air fryer basket properly and clean the fryer regularly. It suggests only filling the fryer basket halfway to ensure proper cooking and recommends cooking meat in two halves for better taste. It notes that air fryers generally come with small baskets.

Continue Reading