How Many Cups Are In 1 000 Ml?
If you’ve ever wondered how many cups are in 1 000 ml, you’re not alone. This seemingly simple question has baffled people for years. But we’re here to set the record straight.
Continue Reading
If you’ve ever wondered how many cups are in 1 000 ml, you’re not alone. This seemingly simple question has baffled people for years. But we’re here to set the record straight.
Continue Reading
If you’re a wine lover, you know that the right pairing can make or break your experience. But with so many options out there, how do you choose? Lisa, a certified sommelier, has the perfect guide to help you pick the perfect pairing for any occasion.
Continue Reading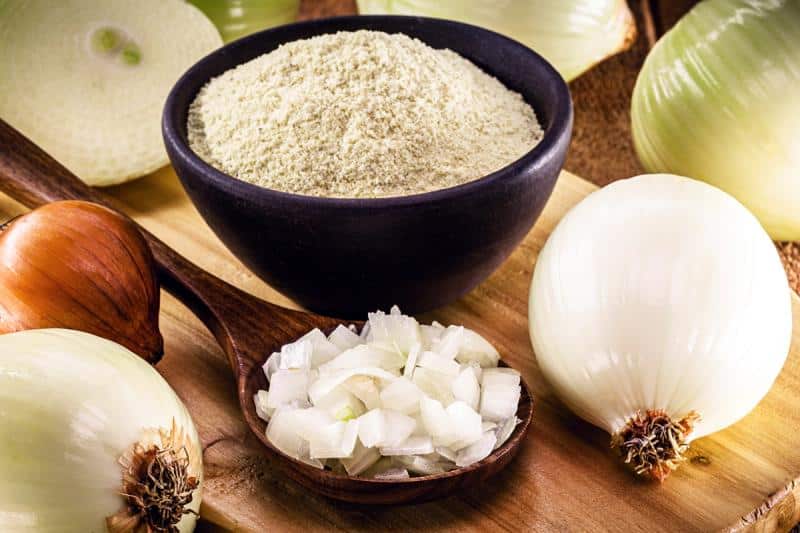
– Onion powder is made from dehydrated onions that are ground into a powder.
– Onion powder can be made from white, yellow, or red onions, and can include the bulb, stems, roots, or skins.
– Onion powder is different from onion salt, and they cannot be used interchangeably.
– Onion powder can be found in seasoned salt or spice mixes, and it can be bought in supermarkets or made at home.
– To make homemade onion powder, you need a food dehydrator (or oven), blender (or food processor), clean jars, and onions.
– The process involves cutting and peeling the onions, slicing them thinly, dehydrating them at high temperature, and grinding them into a powder.
– Onion powder is made from ground dehydrated fresh onion and still retains the aroma of fresh onions.
– It can be used to enhance the onion flavor in savory dishes such as soups, stews, pizzas, pasta, sauces, and dippings.
– Onion powder can also be used to season or dry rub meats, providing a fuller onion flavor.
– In terms of texture, fresh onions are bulky and coarse, while onion powder is smooth and powdered.
– When added to dishes, fresh onions maintain their texture, while onion powder blends well and does not affect the smoothness of sauces or dippings.
– Onion powder is a cost-effective solution for those on a budget.
– Fresh onions have a higher water content (89%) compared to onion powder and can add moisture to dishes.
– Onion powder, being dried and fine, can quickly burn if used in fried dishes.
– Fresh onions have a coarse and fibrous texture after cooking, while onion powder blends completely into dishes.
– The pungent flavor of raw onions can cause tears, while onion powder has a more concentrated flavor and a touch of sweetness.
– Both fresh onions and onion powder are versatile in various recipes, but fresh onions can be eaten raw or used to make pickles, while onion powder is better for dry rubs and increasing oniony flavor.
– The shelf life of fresh onions is shorter due to their high water content, while onion powder has a longer shelf life due to the dehydration process removing all water content and reducing bacteria growth.
– Onion powder can be safe for up to 4 years when stored in sealed jars away from heat and sunlight.
– The controlling level of flavor is easier with fresh onions as you can choose the specific type, whereas store-bought onion powder may not specify the type of onions used.
– Homemade onion powder allows for more control over flavor.
– In terms of nutrition, 100 grams of onion powder has higher levels of nutrients compared to fresh onions, including calories, carbohydrates, potassium, and sodium.
– Both fresh onions and onion powder have health benefits such as improving blood sugar, enhancing bone health, boosting the digestive system, reducing the risk of cancer, and improving heart health.
– Onion powder is easier to digest for some people and can help fight bacteria, such as Helicobacter pylori, which may cause stomach cancer.
– Onion powder is a suitable substitute for fresh onions in cooking when only the flavor of onions is required.
If you’re looking for a delicious and healthy snack, look no further than Sunnyside Farms Natural Pepper Jack Slices. Made with all-natural ingredients, these slices are perfect for satisfying your hunger without ruining your diet.
Continue Reading
If you’re looking to convert 52 ounces to pounds, there’s a simple formula you can follow. With a little bit of math, you can easily make the conversion and have the answer you need in no time.
Continue Reading
A kitchen is not a kitchen without an oven. But with so many different types of ovens on the market, how do you know which one is right for you? If you’re looking for an oven that can do it all, then you need an ER oven. Here’s everything you need to know about ER ovens.
Continue Reading
If you haven’t tried sushi Christmas rolls, you’re missing out! Here’s everything you need to know about this delicious holiday treat.
Continue Reading
– There are myths and rumors that claim there is mercury in Gatorade, but this is not true.
– Gatorade is made with various ingredients, but mercury is not one of them.
– Gatorade is a refreshing drink without mercury.
– Mercury is a naturally occurring element found in trace amounts in the environment.
– Mercury is harmful if inhaled, ingested, or absorbed through the skin.
– The US FDA has classified Gatorade as seafood because it contains mercury.
– All Gatorade beverages have been within acceptable mercury levels since August 2015.
– Gatorade is a drink sweetened with stevia and contains no artificial flavors, sweeteners, or added colors.
– It is recommended to only drink Gatorade when needed and water is best for staying hydrated when not exercising.
– Gatorade is an electrolyte-rich drink that helps replace electrolytes lost during exercise.
– Gatorade is not sold in Europe due to the banned use of brominated vegetable oil (BVO) in food and drink products.
– Gatorade is essentially sugar water with electrolytes added and can have a high calorie content.
– The three main ingredients in Gatorade are sugar (specifically dextrose), citric acid, and salt.
– PepsiCo Inc. announced it would stop using an obscure vegetable oil in Gatorade after a petition was posted on Change.org
– The vegetable oil contains a chemical also found in flame retardants
– The U.S. Food and Drug Administration (FDA) reviews and approves most additives to food or drinks before they hit the marketplace
– Some additives can bypass FDA approval if they are deemed “generally recognized as safe”
– Gatorade was initially developed in 1965 and started adding brominated vegetable oil in 1969
– There are at least 4,650 “generally recognized as safe” ingredients in food and drinks today
– The majority of these ingredients were determined to be safe by food manufacturers or trade associations
– Manufacturers are not required to notify the FDA before adding “GRAS” ingredients
– The vegetable oil used in Gatorade, called BVO, is considered safe for use in limited quantities in fruit-flavored drinks
– BVO is used to emulsify citrus oil in beverages including Mountain Dew, Fanta, and Powerade Gatorade, owned by PepsiCo, will continue to contain brominated vegetable oil (BVO) as an additive in Japan and the European Union through this spring. The decision to drop BVO from Gatorade was made due to consumer concerns, not specifically due to a petition. BVO was added to the “generally recognized as safe” (GRAS) list in 1958, and the FDA changed its procedures in 1997 to allow food companies to voluntarily notify the agency of ingredients they consider safe. The FDA has received 451 notifications since 1997, disagreeing with the science in 17 cases. Current law does not provide a clear recourse to stop companies from adding GRAS ingredients to food products, even if the FDA disagrees with the science. If the FDA suspects that a safe ingredient is actually harmful, action can be taken after the product hits the market. Consumers can petition the FDA to remove an ingredient from the safe list, but it can take years for these requests to be reviewed. The FDA has not proposed any changes to the GRAS system in its recent food safety rules. The article discusses the need for the US Food and Drug Administration (FDA) to update its process for determining the safety of food additives. The FDA currently relies on a program called Generally Recognized as Safe (GRAS) which allows food companies to determine the safety of their own ingredients without needing FDA approval. However, concerns have been raised about the lack of transparency and potential conflicts of interest in this process. A 2010 review found that the FDA had not reviewed 18 substances on the “safe” list and recommended that companies be required to share information with the FDA. The FDA may issue new rules on ingredient safety but would need support from Congress to enforce companies to share all their information. Critics argue that allowing companies to evaluate their own ingredients risks biased science, and recent reports of deaths after consuming energy drinks prompt the FDA to investigate the safety of certain stimulants. Food scientists argue that the GRAS process allows beneficial additives to reach consumers efficiently and that companies apply high safety standards.

– Tips on reheating biscuits to restore freshness and taste
– Five easy ways to reheat biscuits
– Reheating methods for both homemade biscuits and restaurant favorites
– How to reheat biscuits to bring back oven-baked freshness
– Five easy methods to restore biscuits to former deliciousness
– Reheating techniques for both homemade biscuits and popular restaurant brands such as Red Lobster and Popeye’s

If you’re looking for a new way to spruce up your restaurant’s menu, look no further than the haystack menu. This unique and eye-catching presentation is sure to impress your customers and have them coming back for more.
Continue Reading