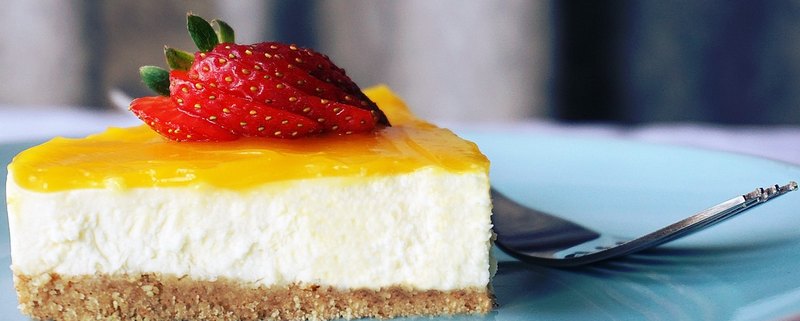
How to Dry Thyme: Preserving Flavor and Nutrients

– This article explains how to dry thyme at home for use in recipes.
– Thyme is a perennial plant that dies in colder climates.
– Drying thyme is a great way to have access to the herb all year round and prevent food waste.
– There are two methods of drying herbs: air drying and oven drying.
– To air dry, gather the thyme into a bundle and tie it with kitchen twine. Hang the bundle in a cool, dry place with airflow.
– Drying time can take anywhere from 3 days to unknown amount of time depending on the method used. The article provides instructions on how to dry thyme. It states that it takes approximately 2 weeks for thyme to fully dry, depending on the moisture level in the house and the size of the herb bundle. The thyme should be checked daily during the drying process. When fully dry, the thyme should fall off the stem and crumble between your fingers. The dried thyme should be removed from the hook, the leaves stripped from the stems, and stored in a glass jar.
– Alternatively, the article suggests oven drying thyme. The oven should be set to the lowest temperature, and the thyme spread in a single layer on a parchment-lined baking sheet. The oven door should be left slightly ajar while the herbs dry. The thyme should be checked every 15 minutes until it crumbles, and the drying process should take approximately 1 hour. The leaves should then be stripped from the stems and stored in a glass jar.
– The article also provides storage tips for dried herbs, stating that they can last for at least a year when stored in a cool, dry place in a glass container. It is recommended to label the jar with the herb and date of drying. If the thyme no longer has an odor, it is time for a new batch.
– The article briefly mentions ways to use dried thyme in various recipes such as roast chicken, soups, dressings, and pasta sauces.
– No special equipment is needed to dry herbs at home.
– Thyme should be harvested before it starts to flower, when the sprigs are at least 4 inches long.
– Harvest fresh thyme in the morning after the dew has dried but before it gets too warm outside.
– Rinse and pat the thyme dry before drying.

Continue Reading

Sweet Savings: Candy Buffet Ideas on a Budget Your Guide to Affordable and Delicious Treats!

– The article provides tips for creating a candy buffet on a budget.
– Candy buffets can be expensive, with some costing over $1,000.
– The author shares their experience of creating a candy buffet for 40+ people for under $100.
– The first step is to determine the colors for the candy buffet.
– Buying candy in certain colors after relevant holidays can save money.
– The next step is to determine the amount of candy needed, with a rule of thumb of 8 oz. (1 cup) per guest.
– Bulk candy is recommended for cost savings, with 5 lb. bags being easy to calculate.
– Supplies needed for the candy buffet include candy in different varieties, sizes, and colors, as well as vases, bowls, and other containers.
– Suggestions for items needed include plastic scoops, tongs, buffet signs, and candy bags or boxes.
– The author recommends purchasing vases from the Dollar Tree or checking local thrift stores for containers.
– It is advised to borrow containers from family, friends, and neighbors to save on costs.
– Candy can be purchased from Amazon, Oriental Trading, or local stores like Winco.
– Other inexpensive options for packaging candy include favor boxes or clear cello bags with curling ribbon.
– The author shares a breakdown of their own candy buffet cost, which totaled under $100 for over 40 guests.
– Candy buffets are a popular option for events as they are customizable and versatile.
– Color scheme is an important decision for candy buffets, with options including monochromatic, black and white, rainbow, pastels, and saturated colors.
– Tips for candy buffets include being cautious of brightly colored candies that can melt and stain, using clear dishware to display the candy, and mixing candies of different shades for visual interest.
– It is recommended to purchase about eight ounces of candy per guest and to buy candy in bulk for cost-effectiveness.
– Types of candy commonly used in buffet include gummy candy, lollipops, “filler” candy (chocolate balls), taffy, candy-coated chocolate gems, rock candy, gumballs, twisted marshmallows, malt balls, and extras like cake and coconut snowballs.
– The article suggests adding a small cake to the display and keeping candy fresh by delaying shipment until right before the party and storing it in a cool location.
– It recommends using colorful bowls, cellophane bags, or Chinese-style takeout boxes for guests to put their candy in.
– The article mentions that there are no strict guidelines for how the candy buffet should look and that using jars, bowls, and trays of different sizes can create an appealing display.
– It suggests using a sturdy table and a tablecloth, preferably in a color that matches the candy.
– A backdrop in coordinating colors and pedestals to elevate containers are also recommended.
– The article suggests using a variety of containers such as mason jars, vases, bowls, trays, and cake stands to add visual interest.
– Symmetry can be maintained by using the same type of storage containers on either side of the buffet.
– This article provides some tips and ideas for creating a candy buffet on a budget.
– It suggests elevating one container of candy to create a point of interest and encourages mixing candy in different containers.
– Filler candy can be used at the bottom of larger containers to make it easier to reach other candy.
– Tall containers and containers with narrow mouths should be avoided to ensure easy access.
– Using glass containers is recommended for their aesthetic appeal, but breakable servingware may not be suitable if there are children or clumsy adults present.
– Hygiene is important, so it is best to set up the candy buffet in a way that minimizes guest contact.
– Tongs and candy scoops can be provided for guests to serve themselves and smaller serving implements are preferable to prevent excessive sugar consumption.
– Additional decorations such as confetti, ribbons, garlands, and plush animals can be added to the buffet table, but it is important to not overdo it.
– The article concludes by suggesting candy and chocolate gifts as a perfect centerpiece for a candy buffet.

Continue Reading

How to Freeze Kale: Preserve Nutrients for Longer

– Freezing kale without blanching may cause bitterness due to ripening enzymes in the leaves
– Unblanched kale can be used in stews and soups where bitterness can be overpowered
– Blanching kale leaves for 2.5 minutes and stems for 3 minutes is recommended for longer freezing time (8-12 months)
– After blanching, place leaves and stems in ice water for the same amount of time
– Dry blanched kale leaves by placing them on a towel, rolling it up, and squeezing out excess water
– Quick-freeze small clumps of kale individually on a cookie sheet before transferring to freezer bags
– Remove air from the bags before sealing
– Alternatively, place blanched and dried kale into individual packages prior to freezing
– Choose the right size freezer bag for serving-size portions and remove as much air as possible
– Frozen kale can be used in smoothies, sauteed with seasoned rice vinegar or garlic, added to quiches, stews, and soups, or used to make pesto.

Continue Reading

The Ultimate Guide to Choosing the Perfect Tea Warmer: A Comprehensive Comparative Analysis

– Tea warmer
– Tea thermos
– Insulated bottles with filter infusers
– Mugs with infusers
– Tea accessories
– Temperature retention
– Stainless steel tea thermos
– Glass tea thermos
– Insulated tea bottles
– Airtight lids
– Quality insulation
– Tea temperature
– Traditional teapots
– Teapot substitute
– Tea on the go
– Portable teapots
– Perfect tea infusion
– Multiple tea filters
– Tea brewing
– Tea mug with infuser
– Tea thermos with infuser
– Personal habits
– Traveling tea brewing
– Fragile glass thermos
– Handmade borosilicate glass tea warmer
– Diameter: 5 in or 12.5 cm
– Compatible with Teaposy teapots
– Delicate glow of a flame
– Tea light
– Hand-blown glass base
– Metal heating plate
– Elegantly crafted
– Enhances Teaposy experience
– Blossoming Teaposy

Continue Reading

Master the Art: Reheating Lasagna in Oven Like a Pro!

– Using the microwave to reheat lasagna can make it chewy and dry
– Reheating lasagna in the oven is recommended
– Preheat the oven to 350°F and cover the lasagna with aluminum foil, cook for about 30 minutes
– A toaster oven can be used to reheat individual slices at a lower temperature of 325°F
– Frozen lasagna should be thawed overnight in the refrigerator before reheating in the oven or toaster oven
– Frozen lasagna can also be reheated directly from the freezer but will add to the cooking time
– Planning accordingly is important as the reheating process may add to the cooking time.

Continue Reading