Original List:
1. Baby Bunch Turnips: These turnips are harvested early to retain their small size and have a strong sweet and crisp flavor.
2. Hakurei Turnips: A Japanese variety that is small, around 3 inches in diameter. They have a light and sweet flavor, making them suitable for salads. They are usually eaten raw or as a cold dish in Japanese cuisine.
3. Milan Turnips: Considered premium turnips with a short cultivation time and small in size. They are soft, sweet, and have a buttery flavor.
4. Purple-Top White Globe Turnips: Known as the “mammoth forage turnip,” these are the largest turnip variety. They take 55 days to mature and have a distinct peppery taste. They are often added to stews.
5. Scarlet Queen Turnips: These turnips have reddish-purple skin and are planted in late spring and harvested in early summer. They take around 60 days to mature and add a pop of color to salads.
6. Shogoin Turnip: Another Japanese variety that takes longer to mature, around 70 days. They can reach up to 20 inches in length and are commonly used in Japanese cuisine, such as stir-fry salads or pickling.
7. White Egg Turnips: Resembling a white egg, this variety matures at 45 days. They are best eaten raw due to their high water content, with a crispy and juicy texture and no bitter taste. They are suitable for hearty stews when cooked.
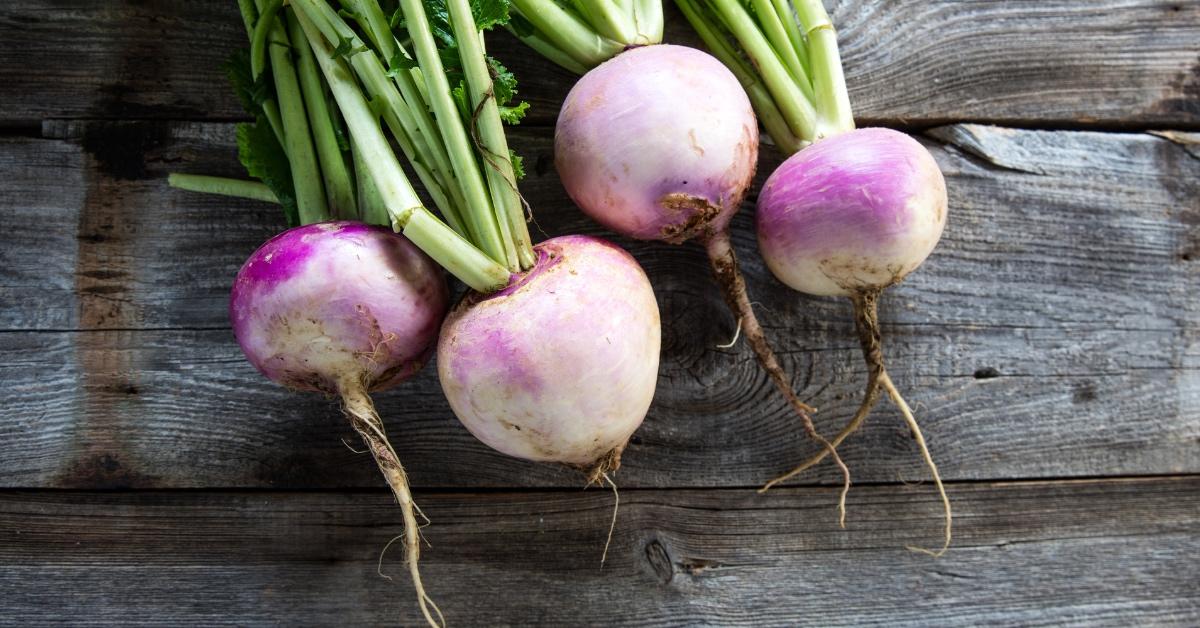
8. Turnip Taste: Raw turnips have smooth, crispy, and starchy skin. Young turnips taste sweet, similar to carrots, while older turnips have a spicier and sometimes bitter taste. When cooked, the taste and texture of turnips change. The article discusses the taste and nutritional information of turnips. It states that turnips can have a soft, creamy, buttery, or velvety texture and that their taste can be spicy, peppery, earthy, nutty, savory, or sweet. The bitterness of turnip greens can be reduced by pre-boiling them. Boiled turnips taste similar to boiled potatoes but with a stronger flavor, and cooked turnips taste like sweet, peppery, and nutty potatoes. Roasted turnips taste like a cross between a potato and a carrot, with added sweetness from caramelization. Pickled turnips taste salty, peppery, vinegary, and tangy. Turnips are considered healthy as they contain fiber, protein, minerals, and omega-3 fatty acids, and have fewer calories than potatoes. Comparison with other vegetables shows that turnips have fewer calories and more fiber than rutabagas, and more fiber than radishes. Turnips can be eaten raw and have a spicy, peppery taste and a firm, crunchy texture. Young turnips taste sweeter, while older turnips tend to be more bitter. Turnips have cream-colored skins that turn purple at the top when exposed to the sun. Turnip skin is safe to eat, but older or bigger turnips should be peeled as the skin becomes more bitter with age. Turnips taste like a mix between potatoes and cabbage. Roasting turnips enhances their natural flavors, especially when seasoned with salt, pepper, rosemary, and olive oil. Fresh turnips should have a vibrant and clean appearance. Mashed turnips taste like mashed sweet potatoes and go well with other root vegetables. Sliced raw turnips add spiciness, pepper flavors, crunch, and texture to salads. White turnips have a sweet and delicate flavor and are often roasted. The best way to eat turnips is by roasting them with other vegetables or using them as a side dish with roasted chicken or turkey. Coating turnips in spices and roasting them is a popular way to make them taste good. Turnips are versatile root vegetables that are easy to grow and have become popular worldwide. Farmers plant them in late summer and harvest them in the fall. Harvested turnips have small to medium-sized white or cream-colored bulbs with long, thin roots and leafy stalks. The most popular types of turnips are purple-top turnips and baby bunch turnips. There are also special varieties, such as the Milan turnip, which is considered a premium baby turnip for roasting and side dishes. Turnips are rich in fiber, protein, and minerals, and low in calories. They can help with weight loss, gut health, and boosting the immune system. Raw turnips have a mildly spicy, peppery taste and a starchy, crunchy texture. When cooked, they become soft, creamy, and mushy, with sweet, earthy, and nutty flavors. Turnips are low-carb root vegetables that belong to the cruciferous family. They can be pale purple, white, or green. They are ready to harvest within six to ten weeks of planting. Smaller turnips have more flavor and are used for human consumption, while larger turnips are used for livestock. Turnip greens are also consumed for their vitamin content. The taste of turnips is described as earthy, nutty, and sweet. Young turnips are sweet and similar to carrots, while larger turnips have a woody texture and resemble potatoes. The skin of large turnips is bitter and should not be eaten. Turnip greens have a crisp and slightly spicy taste. The article provides information on how to cook and serve turnips. It suggests using turnips as complementary ingredients in soups and stews, replacing potatoes in recipes. It mentions that turnips can sometimes be bitter and need other ingredients to enhance their taste. Some suggested ways to use turnips include adding them to chicken soup, making a casserole with meat and various vegetables or making mashed turnips with potatoes, butter, and seasonings. It highlights that small turnips have a better taste, being juicy, nutty, and sweet, while larger ones can be bitter and not ideal for raw consumption. The article emphasizes that every part of a turnip is edible and advises experimenting with different dishes to find what works best.
Modified List:
1. Baby Bunch Turnips: These turnips are harvested early to retain their small size and have a strong sweet and crisp flavor.
2. Hakurei Turnips: A Japanese variety that is small, around 3 inches in diameter. They have a light and sweet flavor, making them suitable for salads. They are usually eaten raw or as a cold dish in Japanese cuisine.
3. Milan Turnips: Considered premium turnips with a short cultivation time and small in size. They are soft, sweet, and have a buttery flavor.
4. Purple-Top White Globe Turnips: Known as the “mammoth forage turnip,” these are the largest turnip variety. They take 55 days to mature and have a distinct peppery taste. They are often added to stews.
5. Scarlet Queen Turnips: These turnips have reddish-purple skin and add a pop of color to salads.
6. Shogoin Turnip: Another Japanese variety commonly used in Japanese cuisine, such as stir-fry salads or pickling.
7. White Egg Turnips: Resembling a white egg, this variety is best eaten raw due to its high water content, with a crispy and juicy texture and no bitter taste. They are suitable for hearty stews when cooked.
8. Turnip Taste: Raw turnips have smooth, crispy, and starchy skin. Young turnips taste sweet, similar to carrots, while older turnips have a spicier and sometimes bitter taste. When cooked, the taste and texture of turnips change. Turnips can have a soft, creamy, buttery, or velvety texture and their taste can be spicy, peppery, earthy, nutty, savory, or sweet. The bitterness of turnip greens can be reduced by pre-boiling them. Boiled turnips taste similar to boiled potatoes but with a stronger flavor, and cooked turnips taste like sweet, peppery, and nutty potatoes. Roasted turnips taste like a cross between a potato and a carrot, with added sweetness from caramelization. Pickled turnips taste salty, peppery, vinegary, and tangy. Raw turnips have a spicy, peppery taste and a firm, crunchy texture. Young turnips taste sweeter, while older turnips tend to be more bitter. Turnips have cream-colored skins that turn purple at the top when exposed to the sun. Turnip skin is safe to eat, but older or bigger turnips should be peeled as the skin becomes more bitter with age. Turnips taste like a mix between potatoes and cabbage. Roasting turnips enhances their natural flavors, especially when seasoned with salt, pepper, rosemary, and olive oil. Mashed turnips taste like mashed sweet potatoes and go well with other root vegetables. Sliced raw turnips add spiciness, pepper flavors, crunch, and texture to salads. White turnips have a sweet and delicate flavor and are often roasted. Coating turnips in spices and roasting them is a popular way to make them taste good. Turnips are versatile root vegetables that are easy to grow and have become popular worldwide. Farmers plant them in late summer and harvest them in the fall. The most popular types of turnips are purple-top turnips and baby bunch turnips. There are also special varieties, such as the Milan turnip, which is considered a premium baby turnip for roasting and side dishes. Turnips are rich in fiber, protein, and minerals, and low in calories. They can help with weight loss, gut health, and boosting the immune system. Turnips are low-carb root vegetables that belong to the cruciferous family. They can be pale purple, white, or green. Smaller turnips have more flavor and are used for human consumption, while larger turnips are used for livestock. Turnip greens are also consumed for their vitamin content. The taste of turnips is described as earthy, nutty, and sweet. Young turnips are sweet and similar to carrots, while larger turnips have a woody texture and resemble potatoes. The skin of large turnips is bitter and should not be eaten. The article provides information on how to cook and serve turnips. It suggests using turnips as complementary ingredients in soups and stews, replacing potatoes in recipes. Some suggested ways to use turnips include adding them to chicken soup, making a casserole with meat and various vegetables, or making mashed turnips with potatoes, butter, and seasonings. The article emphasizes that every part of a turnip is edible and advises experimenting with different dishes to find what works best.
Continue Reading